
Uncategorized

How to Create a Responsive Navigation Menu with HTML and CSS

If you’re a beginner looking to build a responsive navigation menu using pure CSS and HTML, you’re in the right place. Most tutorials out there rely on JavaScript or heavy frameworks, but in this guide we will show you how to create a lightweight, mobile-friendly navbar with a working hamburger toggle using nothing but HTML and CSS. This approach is perfect for small websites, portfolios, landing pages, or anyone who wants to keep their code clean and fast. Why Build a Responsive Menu with CSS Only? Before diving into the code, let’s understand why skipping JavaScript can be a smart choice: Faster load times: no extra scripts to parse. Better accessibility: native HTML elements work with screen readers out of the box. Easier maintenance: fewer moving parts means fewer bugs. Works even if JS is disabled in the user’s browser. The Trick: Using a Hidden Checkbox The secret behind a JavaScript-free hamburger menu is the checkbox hack. We use a hidden <input type=”checkbox”> combined with a <label> to toggle the menu state. When the checkbox is checked, we style the menu accordingly with the CSS :checked pseudo-class. Step 1: Write the HTML Structure Start with a clean, semantic structure. Here’s the base markup for our responsive navigation menu: <nav class=”navbar”> <div class=”logo”>MySite</div> <input type=”checkbox” id=”menu-toggle”> <label for=”menu-toggle” class=”hamburger”> <span></span> <span></span> <span></span> </label> <ul class=”menu”> <li><a href=”#”>Home</a></li> <li><a href=”#”>About</a></li> <li><a href=”#”>Services</a></li> <li><a href=”#”>Portfolio</a></li> <li><a href=”#”>Contact</a></li> </ul> </nav> Note the order: the checkbox comes before the elements we want to style, because CSS sibling selectors only look forward in the DOM. Step 2: Style the Desktop Version Now let’s add the CSS for larger screens first, then adapt for mobile. This is a classic desktop-first approach, but you can flip it to mobile-first if you prefer. * { margin: 0; padding: 0; box-sizing: border-box; font-family: sans-serif; } .navbar { display: flex; align-items: center; justify-content: space-between; background: #1a1a2e; padding: 1rem 2rem; color: white; } .logo { font-size: 1.5rem; font-weight: bold; } .menu { display: flex; list-style: none; gap: 2rem; } .menu a { color: white; text-decoration: none; transition: color 0.2s ease; } .menu a:hover { color: #ff6b6b; } /* Hide the checkbox and hamburger on desktop */ #menu-toggle, .hamburger { display: none; } Step 3: Design the Hamburger Icon The hamburger icon is made of three <span> elements stacked vertically. We only show them on smaller screens. .hamburger { flex-direction: column; cursor: pointer; gap: 5px; } .hamburger span { width: 28px; height: 3px; background: white; border-radius: 2px; transition: all 0.3s ease; } Step 4: Add the Media Query for Mobile This is where the magic happens. Below a chosen breakpoint (typically 768px), we transform the horizontal menu into a vertical drop-down triggered by the hamburger. @media (max-width: 768px) { .hamburger { display: flex; } .menu { position: absolute; top: 100%; left: 0; right: 0; background: #1a1a2e; flex-direction: column; align-items: center; gap: 0; max-height: 0; overflow: hidden; transition: max-height 0.3s ease; } .menu li { width: 100%; text-align: center; padding: 1rem 0; border-top: 1px solid #333; } /* The checkbox trick */ #menu-toggle:checked ~ .menu { max-height: 400px; } /* Animate hamburger into an X */ #menu-toggle:checked ~ .hamburger span:nth-child(1) { transform: translateY(8px) rotate(45deg); } #menu-toggle:checked ~ .hamburger span:nth-child(2) { opacity: 0; } #menu-toggle:checked ~ .hamburger span:nth-child(3) { transform: translateY(-8px) rotate(-45deg); } .navbar { position: relative; } } And that’s it. You now have a fully functional responsive navigation menu using only CSS. Understanding the Key CSS Selectors Here’s a quick breakdown of what makes the hamburger toggle work without any script: Selector Purpose :checked Detects when the hidden checkbox is toggled on ~ (general sibling) Applies styles to siblings that come after the checkbox label[for] Clickable trigger that toggles the linked checkbox max-height transition Creates smooth open/close animation (height auto cannot animate) Common Pitfalls to Avoid Wrong element order: the checkbox must come before the elements you want to affect via the sibling selector. Forgetting to hide the checkbox: use display: none or position it off-screen, but keep it functional. Animating height: auto: it does not work. Use max-height instead. Missing viewport meta tag: without <meta name=”viewport” content=”width=device-width, initial-scale=1″>, your mobile styles will not render correctly. Improving Accessibility Pure CSS menus are great, but you should add a few accessibility touches: Add aria-label=”Toggle menu” on the label. Ensure the checkbox is keyboard-focusable (do not use display: none, prefer opacity: 0 with position: absolute). Provide visible focus outlines on menu links. Where to Go From Here Once you master the basics, you can enhance your responsive navigation menu CSS with: Dropdown sub-menus using :hover and :focus-within Sticky headers with position: sticky Dark mode toggle using another checkbox hack Custom CSS variables for easy theming FAQ Can I really build a responsive navbar without JavaScript? Yes. Using the checkbox hack combined with the :checked pseudo-class and sibling selectors, you can create a fully working hamburger toggle in pure CSS. What breakpoint should I use for mobile? 768px is the most common breakpoint for tablets and phones, but you should choose based on your design. Test at 480px, 768px, and 1024px to cover most devices. Is the CSS-only approach good for SEO? Absolutely. Search engines can crawl standard HTML links without any issue. In fact, a lightweight menu improves page speed, which is a positive ranking signal. How do I close the menu when a link is clicked? Without JavaScript, the menu stays open after a link click on a same-page anchor. If you navigate to a new page, it naturally resets. For same-page navigation, a tiny JavaScript snippet is the cleanest solution. Does the checkbox hack work on all browsers? Yes, it works on all modern browsers including Chrome, Firefox, Safari, and Edge. It has been reliable for over a decade. Building a responsive navigation menu with CSS does not have to be complicated. With a clean HTML structure, a clever checkbox trick, and a well-crafted media query, you can deliver a professional-looking navbar that works on every device without a single line of

How to Create a Responsive Navigation Menu with HTML and CSS Read More »
How to Choose a Color Palette for a Business Website: A Designer’s Process

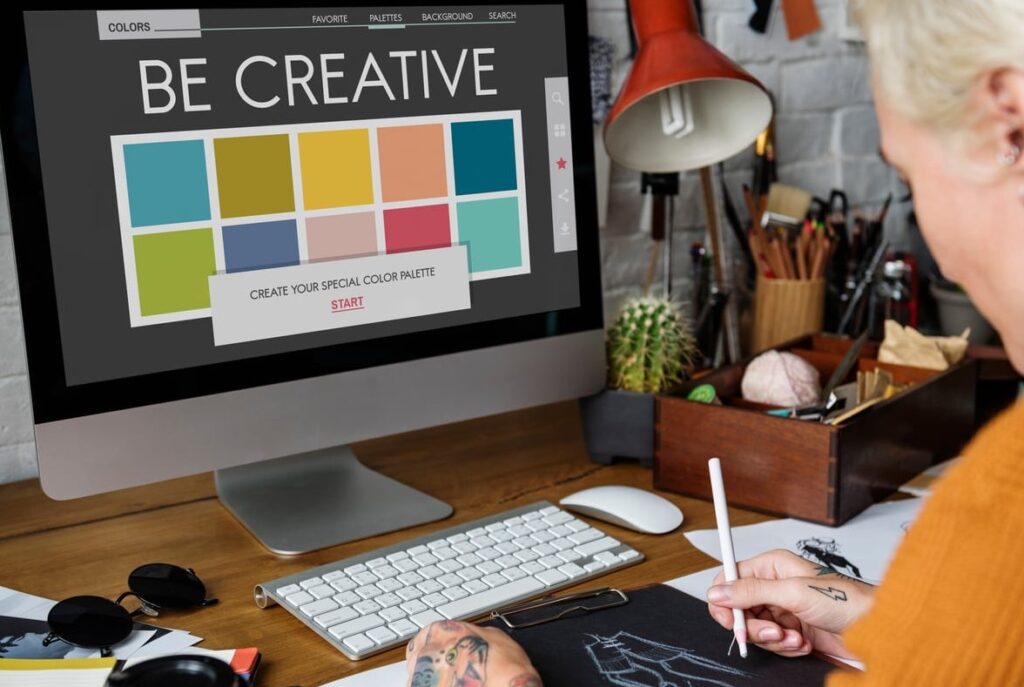
Picking colors for a business website looks easy until you actually sit down to do it. You open a blank canvas, drop in your logo, and suddenly every blue looks wrong. After years of building sites for clients at Panpan Vannes, I can tell you that choosing a color palette is less about taste and more about a structured decision process. This article walks you through exactly how I do it, step by step, so you can apply the same method to your own project. Why Color Choice Matters More Than People Think Color is the first thing a visitor processes on your website, before they even read your headline. Studies in consumer behavior consistently show that people form a judgment about a product or brand within 90 seconds, and a large share of that judgment is based on color alone. For a business website, that means your palette is doing three jobs at once: Communicating your brand personality Guiding users toward conversion actions (buttons, forms, CTAs) Ensuring readability and accessibility for every visitor Step 1: Start With the Business, Not the Colors Before opening any color tool, I ask the client (or myself) four questions: Who is the target audience, and what age range and culture do they belong to? What is the emotional positioning? Premium, friendly, technical, playful, trustworthy? Who are the main competitors, and what palettes are they using? Is there an existing logo or brand guideline I must respect? This step alone eliminates 80% of the color directions that wouldn’t fit. A bank does not need bright orange. A daycare does not need charcoal black. The answers narrow the field before creativity even starts. Step 2: Apply Color Psychology With a Critical Eye Color psychology is useful, but it is not a horoscope. It is a starting point, not a rule. Here is the cheat sheet I actually use in client meetings: Color Common Association Good Fit For Blue Trust, stability, professionalism Finance, SaaS, healthcare Green Growth, nature, wellness Eco brands, food, finance Red Energy, urgency, appetite Restaurants, sports, sales sites Yellow Optimism, attention, warmth Kids, leisure, low-cost services Purple Luxury, creativity, premium Beauty, coaching, premium services Black Elegance, exclusivity, authority Fashion, luxury, agencies Orange Friendliness, action, affordability E-commerce, food, communities The trap is to take these meanings at face value. In 2026, audiences are visually saturated. What matters more is contrast within your industry. If every competitor uses blue, a credible green or warm neutral may serve you better, even if blue is the textbook answer. Step 3: Build the Palette Using the 60-30-10 Rule This is the backbone of almost every clean business website I have ever built. The 60-30-10 rule comes from interior design and translates beautifully to UI: 60% dominant color: usually a neutral (white, off-white, light gray, or dark mode equivalent). This is your background and breathing space. 30% secondary color: your brand color, used for headers, key sections, illustrations, and brand reinforcement. 10% accent color: a high-contrast color reserved for buttons, links, and conversion points. A Concrete Example For a recent B2B consulting client, here is what we ended up with: 60% : #F7F8FA (warm off-white) 30% : #1B2A4E (deep navy, used for typography and section blocks) 10% : #FF7A3D (orange, used only on CTAs) The result feels professional thanks to the navy, modern thanks to the off-white, and converts well thanks to the orange that pops without screaming. Step 4: Expand to a Functional Palette A real website needs more than three colors. You will also need: Two or three neutral shades for borders, dividers, and disabled states Semantic colors: success (green), warning (amber), error (red), info (blue) Hover and active states for every interactive color, usually 10 to 15% darker or lighter than the base I build these in a design tool like Figma as tokens so the developer can plug them directly into the CSS variables. Step 5: Test Accessibility Before You Fall in Love With It This is the step most beginners skip, and it is non-negotiable. The WCAG 2.2 standard requires a contrast ratio of at least 4.5:1 for normal text and 3:1 for large text. If your beautiful pastel button has white text on a soft pink background, it might fail and exclude visually impaired users. My checklist: Run every text/background combo through a contrast checker (WebAIM, Stark, or the built-in Figma plugin) Make sure no information is conveyed by color alone (add icons or labels to error states) Test the palette in grayscale to verify hierarchy still works Check the site through a color blindness simulator (protanopia and deuteranopia are the most common) Step 6: Validate in Context, Not in Isolation A palette looks great on a Pinterest mood board. It can fall apart on a real product page with photos, icons, and user content. Before locking the palette, I always: Apply it to the homepage hero, a content page, and a form Test it on both desktop and mobile Preview it in light and dark mode if relevant Get a gut-check reaction from three people outside the project Common Mistakes to Avoid Too many colors. If your palette has more than five core colors, it is a flag, not a system. Pure black on pure white. The contrast is harsh. Use a very dark gray like #1A1A1A instead. Trendy colors with no link to the brand. The 2026 Pantone color of the year may not fit your accountant client. Ignoring the logo. The palette must coexist with your logo, not fight it. Forgetting CTAs. Your accent color must contrast strongly with the dominant background or conversion will suffer. Tools I Actually Use Coolors.co for fast palette generation and exploration Adobe Color for harmony rules and accessibility checks in one place Realtime Colors to preview a palette on a real-looking website mockup WebAIM Contrast Checker for WCAG compliance Figma Tokens plugin to ship the palette directly to the dev team Final Thoughts Choosing a color palette for a business website is not

How to Choose a Color Palette for a Business Website: A Designer’s Process Read More »

What Are CSS Breakpoints and How to Set Them for Responsive Design

If you’ve ever resized a browser window and watched a website rearrange itself, you’ve seen CSS breakpoints in action. They are the foundation of responsive design, and yet many beginners feel lost when it comes to picking the right values. In this guide, we explain what breakpoints actually are, share the standard pixel values used in 2026, and show you how to choose them based on your content rather than specific devices. What Are CSS Breakpoints? A CSS breakpoint is a specific viewport width at which your website’s layout adapts to provide a better user experience. Below or above that width, the CSS rules change. For example, a three-column grid on desktop might collapse into a single column on a phone. Breakpoints are defined using CSS media queries, a feature built into CSS that lets you apply styles conditionally based on screen size, orientation, resolution, or even user preferences like dark mode. A Simple Media Query Example /* Default styles for mobile */ .container { display: block; } /* Tablet and up */ @media (min-width: 768px) { .container { display: grid; grid-template-columns: 1fr 1fr; } } That’s it. The screen is below 768px? Use the default. The screen is 768px or wider? Switch to a two-column grid. Standard CSS Breakpoints Used Today There is no official rule, but the web community has settled on a few common values that align with how most popular frameworks (Bootstrap, Tailwind, Material UI) define their breakpoints. Device Category Typical Width Common Breakpoint Small phones 320px to 480px up to 480px Large phones 481px to 767px 481px Tablets 768px to 1023px 768px Laptops and desktops 1024px to 1279px 1024px Large desktops 1280px to 1535px 1280px Extra large screens 1536px and up 1536px How Popular Frameworks Compare Framework sm md lg xl Bootstrap 5 576px 768px 992px 1200px Tailwind CSS 640px 768px 1024px 1280px Material UI 600px 900px 1200px 1536px Device-Based vs Content-Based Breakpoints Here’s where most tutorials stop, but where the best designers really start. The old approach was to target specific devices: iPhone, iPad, MacBook. The problem? New devices appear every year with new resolutions. Foldable phones, ultrawide monitors, tablets with mouse support. Chasing devices is a losing game. The Content-First Approach Instead of asking “what device is this?”, ask “at what width does my content start to look bad?”. Resize your browser slowly and watch for these signals: Text lines become too long (more than 75 characters) Images get squeezed or pixelated Buttons or menus overlap White space looks awkward The visual hierarchy breaks down That awkward moment is your real breakpoint. It might be 612px, 834px, or 1180px. The number doesn’t matter, what matters is that your content stays readable and usable. How to Set CSS Breakpoints Step by Step Start mobile-first. Write your base CSS for the smallest screen, then add complexity with min-width media queries. Use relative units when possible. em and rem scale with the user’s font size, which is more accessible than pure pixels. Test on real content. Don’t rely on placeholder text. Real titles and real images expose layout weaknesses. Keep your breakpoints organized. Use CSS variables or a preprocessor (SCSS) to centralize them. Limit the number of breakpoints. Three or four is usually enough. Too many makes maintenance painful. A Complete Copy-Paste Example /* === Mobile First Base Styles === */ .card-grid { display: flex; flex-direction: column; gap: 1rem; padding: 1rem; } .card { width: 100%; } /* === Small Tablets (600px and up) === */ @media (min-width: 37.5em) { .card-grid { flex-direction: row; flex-wrap: wrap; } .card { width: calc(50% – 0.5rem); } } /* === Tablets and Small Laptops (900px and up) === */ @media (min-width: 56.25em) { .card { width: calc(33.333% – 0.667rem); } } /* === Large Desktops (1280px and up) === */ @media (min-width: 80em) { .card-grid { padding: 2rem; max-width: 1200px; margin: 0 auto; } .card { width: calc(25% – 0.75rem); } } Modern CSS: Do You Even Need Breakpoints? Modern CSS gives us tools that reduce the need for breakpoints altogether. Consider these techniques before reaching for a media query: CSS Grid with auto-fit and minmax(): creates responsive grids without any media query. Flexbox with flex-wrap: items naturally wrap when there isn’t enough space. The clamp() function: makes font sizes and spacing fluid between a minimum and maximum value. Container queries: let components respond to their parent’s size rather than the viewport. Example of a grid that adapts without any breakpoint: .auto-grid { display: grid; grid-template-columns: repeat(auto-fit, minmax(250px, 1fr)); gap: 1rem; } This single rule replaces three or four media queries. Powerful, isn’t it? Common Mistakes to Avoid Designing for specific phone models instead of content needs Using too many breakpoints (more than five usually means a structural issue) Forgetting to test landscape orientation on tablets Mixing min-width and max-width queries inconsistently Not testing on real devices, only in browser dev tools FAQ What are the most common CSS breakpoints in 2026? The widely used values are 480px (mobile), 768px (tablet), 1024px (laptop), 1280px (desktop), and 1536px (large screens). These align with most modern frameworks. Should I use min-width or max-width media queries? We recommend min-width with a mobile-first approach. You start with styles for the smallest screen and progressively enhance for larger ones. This generally produces cleaner and more maintainable CSS. What’s the difference between breakpoints and container queries? Breakpoints react to the viewport (browser window) size. Container queries react to the size of a specific parent element. Container queries are perfect for reusable components that need to adapt depending on where they are placed. How many breakpoints should I use? Three to four is enough for most projects. Adding more usually signals that your layout could benefit from fluid techniques like clamp(), Grid, or Flexbox rather than additional media queries. Are pixel-based breakpoints still recommended? They work, but using em units is more accessible. With em, breakpoints scale with the user’s preferred font size, which helps people who increase text size for readability. Final Thoughts CSS

What Are CSS Breakpoints and How to Set Them for Responsive Design Read More »

CSS Grid vs Flexbox: When to Use Which Layout Method in 2026

CSS Grid vs Flexbox: When to Use Which Layout Method If you have ever paused mid-project and asked yourself “Should I use CSS Grid or Flexbox here?”, you are not alone. It is one of the most common questions among front-end developers and designers in 2026, and the answer is not always obvious. This post is not another syntax tutorial. Instead, it gives you a practical decision framework so you can confidently pick the right tool for each situation. We will walk through real-world use cases like navigation bars, card grids, dashboards, and full page layouts so you can stop guessing and start building faster. The Core Difference in One Sentence Flexbox lays out items along one axis (a row or a column). CSS Grid lays out items along two axes (rows and columns at the same time). That single distinction drives almost every decision you will ever make between the two. But real projects are more nuanced than a single sentence, so let us dig deeper. Quick Comparison Table Criteria Flexbox CSS Grid Dimension One-dimensional (row or column) Two-dimensional (rows and columns) Best for Component-level alignment Page-level and complex layouts Content vs Layout driven Content-driven (items dictate size) Layout-driven (grid dictates placement) Wrapping behavior Items wrap but each row is independent Items align across both rows and columns Overlap support Not natively supported Supported with grid-area placement Browser support (2026) Universal Universal (including subgrid) A Simple Decision Framework Before writing a single line of CSS, ask yourself these three questions in order: Am I arranging items in one direction or two? If you only need a single row or a single column, start with Flexbox. If you need to control placement in both directions simultaneously, reach for Grid. Should the content determine the layout, or should the layout determine the content placement? When item sizes should dictate how space is distributed (think a navbar where each link has a different text length), Flexbox is your friend. When you want a strict structure that content slots into (like a dashboard with defined regions), Grid is the better choice. Am I working at the component level or the page level? Flexbox excels inside small components. Grid excels when orchestrating the overall page structure or any section with a clear two-dimensional pattern. If you answer these three questions honestly, you will pick the right tool at least 90% of the time. Real-World Use Cases 1. Navigation Bars: Use Flexbox A navigation bar is a classic one-dimensional layout. Links sit in a horizontal row, and you want flexible spacing between them. Why Flexbox wins here: Items flow naturally in a single row. justify-content: space-between handles spacing effortlessly. Individual items can grow or shrink based on their content. Alignment along the cross-axis (vertical centering) is trivial with align-items: center. You could use Grid for a navbar, but it would be like using a sledgehammer to hang a picture frame. It works, but it is overkill. 2. Card Grids (Product Listings, Blog Archives): Use CSS Grid When you need evenly spaced cards that line up neatly in both rows and columns, CSS Grid is the obvious winner. Why Grid wins here: grid-template-columns: repeat(auto-fill, minmax(280px, 1fr)) creates a responsive card grid in a single line. Cards align perfectly across rows and columns, unlike Flexbox where each row wraps independently and the last row can look uneven. The gap property handles gutters cleanly without margin hacks. The Flexbox trap: Many developers use flex-wrap: wrap for card layouts and then struggle when the last row has fewer items that stretch awkwardly or leave uneven gaps. Grid avoids this entirely. 3. Full Page Layouts (Header, Sidebar, Content, Footer): Use CSS Grid Page-level layouts are exactly what CSS Grid was designed for. Named grid areas make the code readable and easy to maintain. Why Grid wins here: You can define the entire page skeleton with grid-template-areas. Reordering sections for different screen sizes is as simple as rewriting the template in a media query. Sidebar and main content can share a defined relationship without fragile calculations. 4. Form Layouts: Use CSS Grid Forms with labels and inputs lined up in a two-column pattern benefit greatly from Grid. Labels in column one, inputs in column two, with perfect alignment throughout. 5. Centering a Single Element: Use Flexbox (or Grid) Both tools handle centering well. Flexbox needs three lines: display: flex; justify-content: center; align-items: center; Grid can do it in two: display: grid; place-items: center; Both are perfectly valid. Pick whichever your team is more comfortable reading. 6. Inline Elements with Dynamic Sizing (Tags, Badges, Breadcrumbs): Use Flexbox Any time items should size themselves based on their content and just flow in a line, Flexbox is the natural choice. Think tag clouds, breadcrumb trails, or pill-shaped filter buttons. 7. Overlapping Elements and Layered Layouts: Use CSS Grid Need a hero section where text overlaps an image? Grid lets you place multiple items into the same grid cell, creating overlaps without resorting to position: absolute. Flexbox cannot do this at all. Can You Use Both Together? Absolutely, and you should. The best modern layouts combine both techniques. A typical approach looks like this: Use CSS Grid for the overall page structure (header, sidebar, main content, footer). Use Flexbox inside individual components that live within those grid areas (the navbar inside the header, a row of buttons inside a card, etc.). Thinking of Grid and Flexbox as competitors is a mistake. They are complementary tools, and the best developers in 2026 use them side by side without hesitation. Common Mistakes to Avoid Using Flexbox for everything just because you learned it first. If you find yourself fighting flex-wrap to make a two-dimensional layout behave, switch to Grid. Using Grid for a simple row of buttons. Grid adds unnecessary complexity when a single-axis layout is all you need. Disabling flexibility in Flexbox. As the MDN documentation puts it: if you are using Flexbox and find yourself disabling some of its flexibility, you probably need CSS

CSS Grid vs Flexbox: When to Use Which Layout Method in 2026 Read More »

What Is Anchor Text in SEO and Why It Matters for Link Building

What Is Anchor Text? Anchor text is the visible, clickable text in a hyperlink. When you see a colored or underlined word or phrase on a webpage that you can click to go somewhere else, that text is the anchor text. In HTML, it looks like this: <a href=”https://example.com”>This is the anchor text</a> In the example above, the words “This is the anchor text” are what users see and click on. The URL hidden behind it is the destination the link points to. Search engines like Google use anchor text as a signal to understand what the linked page is about. That is why anchor text plays such an important role in SEO and link building strategies. Why Does Anchor Text Matter for SEO? Anchor text matters because it sends contextual signals to both users and search engines. Here is why you should pay attention to it: Relevance signals: Google reads anchor text to determine the topic and relevance of the page being linked to. If many links pointing to a page use the anchor text “best running shoes,” Google understands that the page is likely about running shoes. User experience: Descriptive anchor text helps visitors know what to expect before they click a link. This reduces bounce rates and improves engagement. Accessibility: Screen readers rely on anchor text to describe links for visually impaired users. Generic phrases like “click here” provide no useful context. Link equity distribution: Anchor text helps search engines understand the relationship between pages, which influences how link equity (sometimes called “link juice”) flows across your site and from external sources. The Different Types of Anchor Text Not all anchor text is created equal. Understanding the different types will help you build a natural and diverse link profile. Here is a breakdown: Type Description Example Exact Match The anchor text matches the target keyword of the linked page exactly. anchor text optimization Partial Match Contains a variation or part of the target keyword along with other words. tips for anchor text in SEO Branded Uses the brand name as the clickable text. Panpan Vannes Generic Uses a non-descriptive phrase that gives no keyword context. click here, read more, learn more Naked URL The raw URL itself is used as the anchor text. https://panpan-vannes.com Image Anchor When an image is linked, Google uses the image’s alt text as the anchor text. Alt text: “SEO link building guide” LSI / Related Keywords Uses synonyms or semantically related terms instead of the exact keyword. hyperlink text best practices How Search Engines Use Anchor Text Google’s algorithm has used anchor text as a ranking factor since its earliest days. The original PageRank paper by Larry Page and Sergey Brin specifically mentioned that anchor text associated with a link provides a useful description of the target page. Here is how search engines interpret anchor text in practice: Topic association: When multiple links point to a page with similar anchor text, Google associates that page with the topic described in those anchors. Link quality assessment: Natural, varied anchor text profiles are seen as a sign of organic linking. Unnatural patterns (like hundreds of exact match anchors) raise red flags. Contextual understanding: Google does not just look at the anchor text itself. It also considers the surrounding text, the linking page’s topic, and the relationship between the two pages. A Real-World Example Imagine you run a bakery website. If 50 food blogs link to your page about sourdough bread, and most of them use anchor text like “sourdough bread recipe,” “how to bake sourdough,” or “best sourdough guide,” Google gets a very strong signal that your page is a go-to resource for sourdough bread content. Anchor Text Best Practices for 2026 and Beyond Getting anchor text right is about balance. You want to provide helpful context without looking like you are trying to manipulate search rankings. Follow these guidelines: 1. Keep It Natural and Diverse Your anchor text profile should look like it was built organically. That means having a healthy mix of branded, partial match, generic, and naked URL anchors. If every backlink to your site uses the same exact match keyword, that is a clear signal of manipulation. 2. Make It Descriptive and Relevant The anchor text should accurately describe what the user will find when they click the link. Avoid misleading anchors. If you link to a page about email marketing, the anchor should reflect that topic. 3. Avoid Over-Optimization This is the single biggest mistake beginners make. Over-optimization happens when you use exact match anchor text too frequently. Google’s Penguin algorithm update specifically targets this behavior and can result in ranking penalties. A safe general distribution might look something like this: Anchor Text Type Suggested Proportion Branded anchors 30-40% Partial match / Related keywords 20-25% Naked URLs 15-20% Generic anchors 10-15% Exact match 5-10% Note: These are general guidelines, not strict rules. Every niche and competitive landscape is different. The key takeaway is to keep exact match anchors as a small portion of your overall profile. 4. Write for Humans First Before thinking about search engines, ask yourself: “Would a real person reading this sentence understand where this link leads?” If yes, you are on the right track. 5. Use Context Around the Link Google looks at the words surrounding your anchor text too. Make sure the sentence and paragraph around the link are topically relevant to the destination page. 6. Avoid These Common Mistakes Stuffing keywords into anchor text: “Best cheap affordable SEO tools online free” is not helpful to anyone. Using the same anchor text repeatedly: Variation is your friend. Linking irrelevant pages: Do not force a link where it does not naturally belong. Overusing “click here” or “read more”: While some generic anchors are fine, relying on them exclusively wastes an opportunity to provide context. Ignoring internal links: Anchor text optimization is not just for backlinks. Your internal linking strategy benefits from descriptive anchors too. Anchor Text for Internal Links vs. External Links The principles

What Is Anchor Text in SEO and Why It Matters for Link Building Read More »

About us

We believe that every business is unique, and we tailor our services to meet the specific needs of our clients. Whether you need a new website or are looking for help with your existing site, we can assist you.

Contact Info

Subscribe Now!

Copyright © 2022 PV Design Services. All Rights Reserved.